usttad project – bidri craft technique
This post covers Harpreet’s design workshop with traditional Bidri craftspeople at Bidar, Karnataka during June 2017 as part of USTTAD – a project of the Ministry of Minority Affairs, Government of India in partnership with NIFT – National Institute of Fashion Technology.


The topic of Craft in India may be imagined as a musty crumbling library with more librarians than readers and terribly low chances of any new books being added to its shelves. Harsh as this may sound, even after I may be forgiven for my admitted lack of awareness of current developments, this may be the truth.
Earlier this year, I accepted to be part of the USTTAD project on behalf of NIFT Bengaluru, which involved working with one of three selected crafts in the southern Indian state of Karnataka. My opting for Bidri was largely influenced by my total ignorance of the making technique and of the people who practice it. The allure of newness. And of course a sense of optimism towards an opportunity like the one presented.
As designers, I often think we are like trained marksmen, killers on hire. We descend upon our subject in full concentration, educating ourselves in extremely short periods of time about their core behavioural patterns and identifying the optimum modus-operandi to achieve a clear objective. I think it works. Though maybe not in a manner as simple as that.
A typical USTTAD project workshop involves the development of a range of 25 objects within a workshop span of 15 intensive days on location with a group of 15 craftspeople mentored by a single master craftsperson. The objects to be developed should ideally bridge a now reducing gap between the craftsman’s aesthetic and the taste of the urban Indian consumer. This does not, however, permit the visiting designer to shun everything that precedes his or her visit. I think it’s important to remember that even the most traditional of objects was once the most contemporary creation of its time. It is surprisingly quite easy to often overlook this thought. We tend to bundle everything preceding us in a common cabinet labeled history, and lock it up. But this discussion shall go well beyond a small post like this. Moving on.
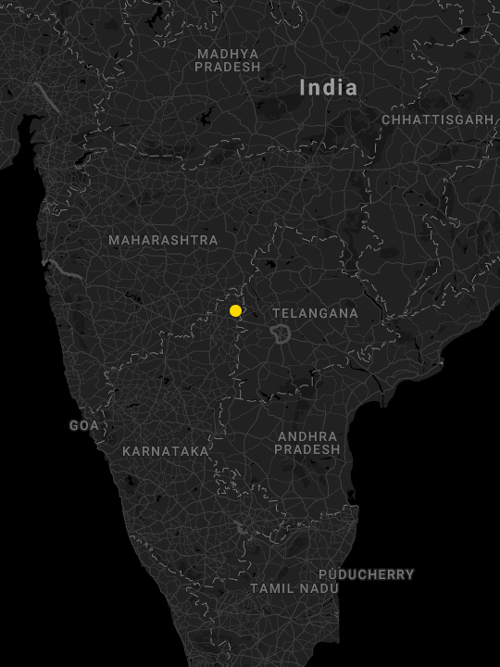
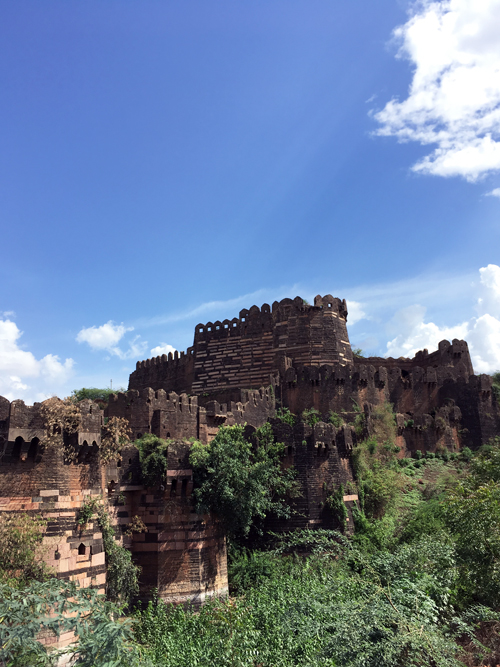
Bidar, the city that lends Bidriware its name, is a small hilltop town in Northern Karnataka. One of many laterite moles on the vast cheek of the Deccan plateau. Due to its location, there is as much Telangana as Maharashtra in its local Kannada flavour. Hindi is spoken everywhere, a blessing for a visiting designer already struggling with four languages.

The closest and possibly fastest connection to Bidar from cities outside Karnataka is via Hyderabad. 2 hours from Delhi, and then 3 or 4 hours via state bus or taxi. The state buses are cheaper and better acclimatisers to the winds that sweep the Deccan Plateau. Taxis are taxis.
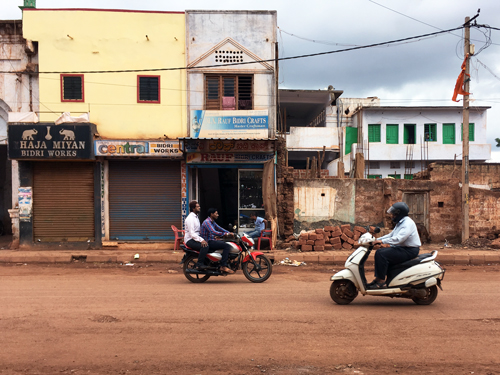
The workshop I’m working with is in the busy old fort area, very close to the easily identifiable ancient tower called the Chowbara. The soil is a burnt red across the city. Its like being in a film with a dominant colour filter. Laterite bricks are everywhere, and so are exposed laterite hills.
On my request, the fifteen day workshop was extended to twenty days. A few extra days to soak in the local-ness. After much necessary paperwork, verification of the participants and even a short speech by me and the coordinating officer from NIFT, I dive right into quickly making as many mistakes with my prototypes as I can. Hopefully, of the 25 objects required, 10 would turn out worthy of further marketability.
The process of making a typical Bidriware object is not very complex to understand visually. Though on the technical (and chemical) front, things are different. To describe it briefly, Bidri involves the inlay of either silver, copper or brass onto a surface that is an alloy of zinc and copper – which is then oxidised to a deep black, leaving the inlaid metal unaffected in stark contrast.
Expanding into more detail, I divide the process into five main parts. First – the creation of the ‘master’ piece from which other replicas shall be generated. Second – the surface ornamentation and creation of the patterned bed into which the silver (or brass, copper) shall be inlaid. Third – the sand casting of this master to generate the required number of pieces. Four – inlaying the silver. And five – the pre-finishing, oxidation and final finishing of the piece.
In terms of importance, the engraving/chiseling of the patterned bed is a core skill. What pattern shall be engraved is a matter of either personal choice of the artisan, in which case he may consult his heirloom of sheets, photocopies or tracings – or, it could be briefed by the designer or entity who has commissioned the order.
The other important step is the surface oxidation of the zinc alloy, which is how the name Bidri actually comes about. Amongst the craftspeople, the sudden deep matt black oxidation of the previously shiny silvery alloy is attributed to the process of heating the finished object in a mixture composed mainly of soil collected from the shaded ramparts of the Bidar fort. Researchers have probed further on the subject of this particular oxidation due to the local fort soil. The black patination has been studied in detail and the results presented in the paper ‘The Technical Examination of Bidri Ware” by Susan La Niece and Graham Martin, even though the precise cause of the blackening has not been determined.
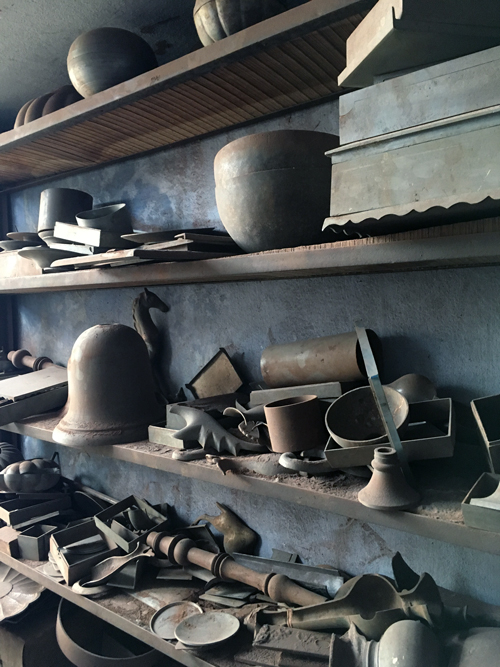
To explain it visually, the process begins with the selection of the ‘master’ design piece. That is if the object to be produced is one that has been ordered previously. In the case of a new design, the process begins with making this ‘master’ design itself. Local carpentry workshops assist in this case with either turned wood models or shaped wood blocks (using jig saws and sanding belts). In other cases, waste plastic (acrylic) sheets may be cut and joined to produce a rough model. This model is then sand cast once to produce what shall be the ‘master’ design piece. Many such master designs may be seen in this picture of the workshop store above.
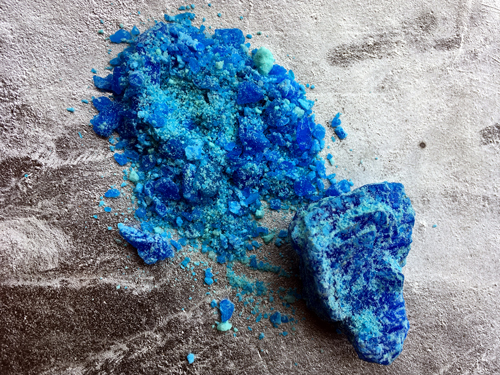
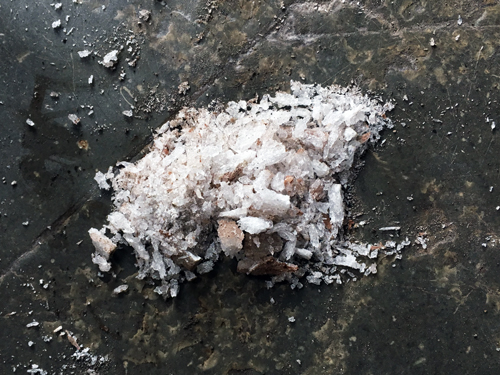
In order to prepare the surface to create an engraving pattern, a small pouch containing moist copper sulphate is quickly dabbed over the surface. Copper sulphate is bright blue in colour, and the dabbing produces a black patination over the surface of the master design. This helps in creating the engraving pattern since it shall be easily visible on the blackened surface.

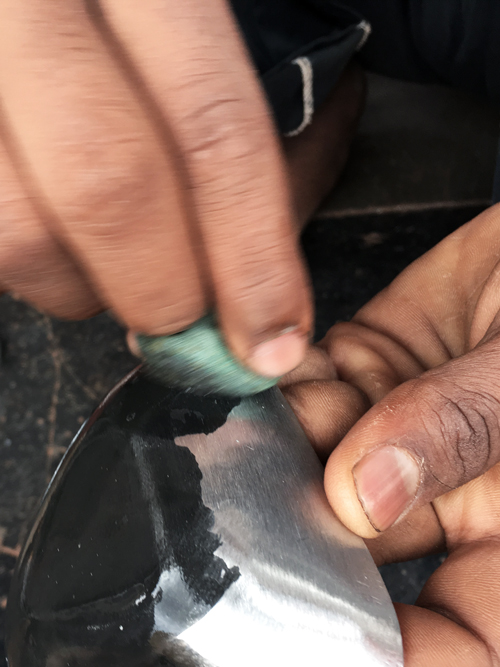
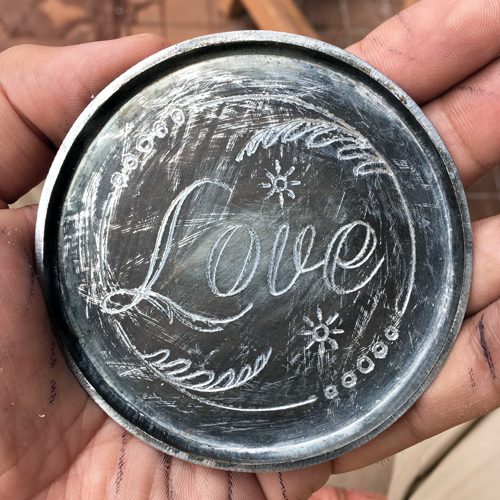
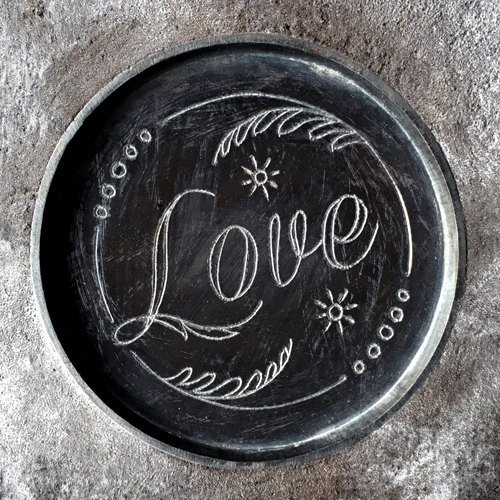
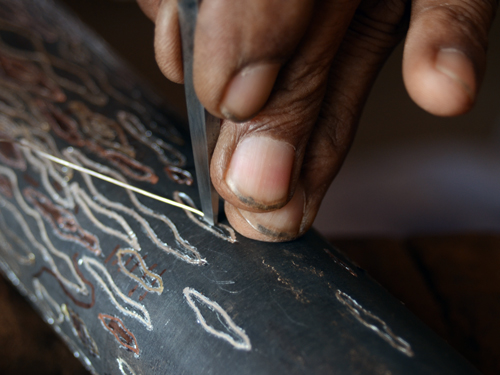
This is a picture of a pattern scratched upon the master design surface, before the engraving begins. In this case, the pattern was requested by me to be drawn by memory.


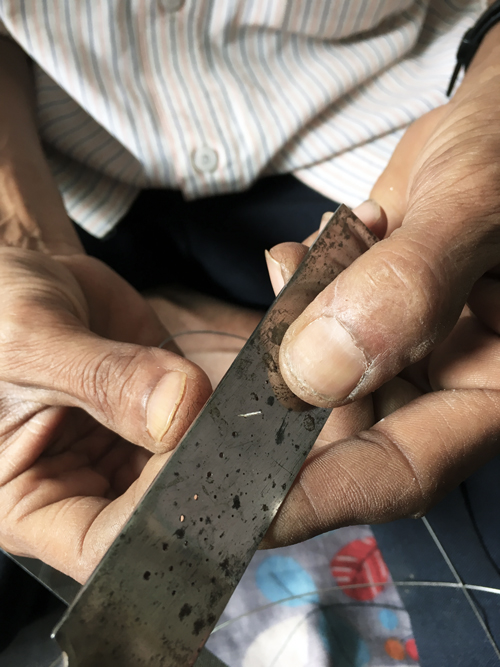
The engraving tools used to create the inlay ‘bed’ for either silver wire or sheet are shown in the pictures above. The interesting part being that these engraving chisels are engineered from old files. Understandably due to the hardness of files. The local blacksmith assists in deriving the rough sizes and shapes, though the final sharpening is done by the craftspeople themselves.

For the inlay of wire (left), only the outline path is engraved. For the inlay of sheet (right), the entire design is chiseled out to create a ‘bed’ that shall accommodate the sheet to be inlaid.

By the time the engraving progresses, the blackened surface of the master design turns a dull grey. This is still sufficient to provide the visual contrast needed for accurate engraving.
Once the engraving is complete, the master design will look like the picture above. A flat chisel has been used to debur the sharp edges produced due to engraving. Once it is sandpapered and cleaned, the master will look like the lower picture, and is ready to be sandcast into replicas.
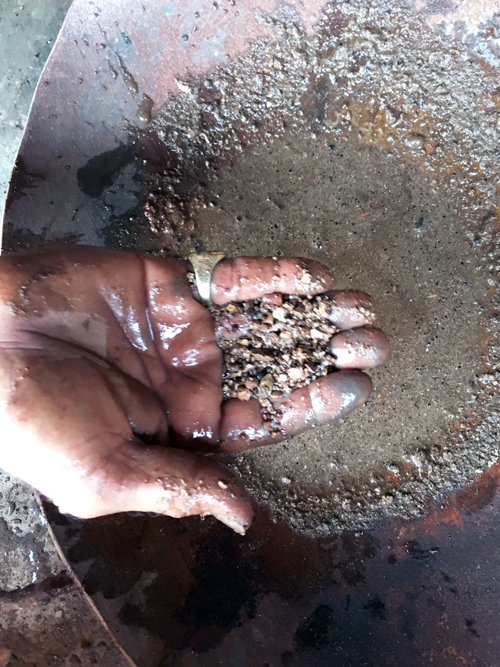
The materials crucial to sand casting can be seen in the pictures above. In the upper picture, the sandy soil that shall be used to create the sand mould and in the lower picture, molten alloy of zinc and copper (9:1 ratio) that shall be poured into it. For better understanding, the video below should explain it much more clearly. Do excuse my decision to shoot the video in a vertical format.
The sand cast pieces are then filed, brushed, sanded and cleaned to prepare them for the wire inlay (or sheet, depending on the design). In the picture above, the pieces are to be inlaid with silver as well as copper wire.

A variety of tools are used at different stages of the process, though the ones above are the most frequently used. These do not include the buffing wheels which impart the final polish to the finished object.
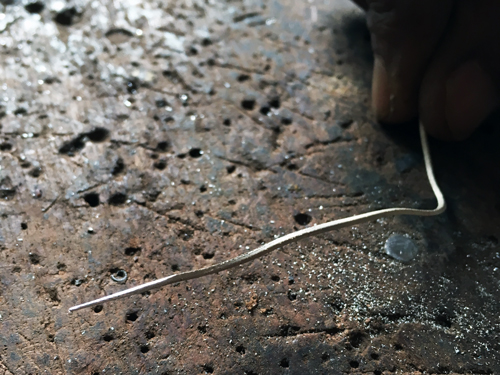
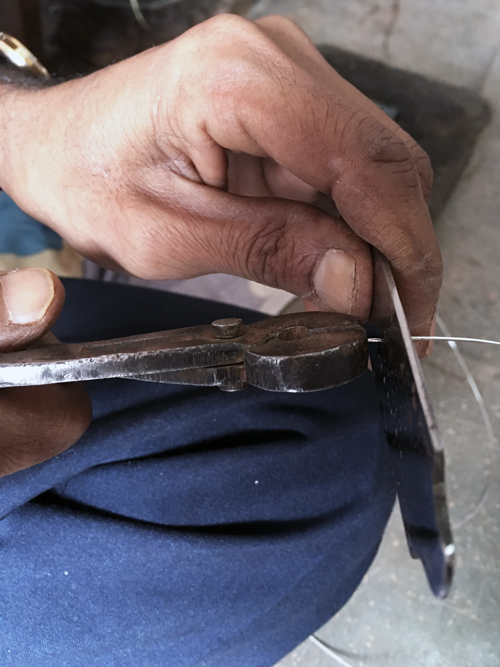

The pictures above show the sequence of wire drawing – thinning down wire to match the engraved channel ‘bed’ that it must be inlaid into. A wire drawing plate helps in this regard, thinning the wire through pulling via sequentially smaller holes.
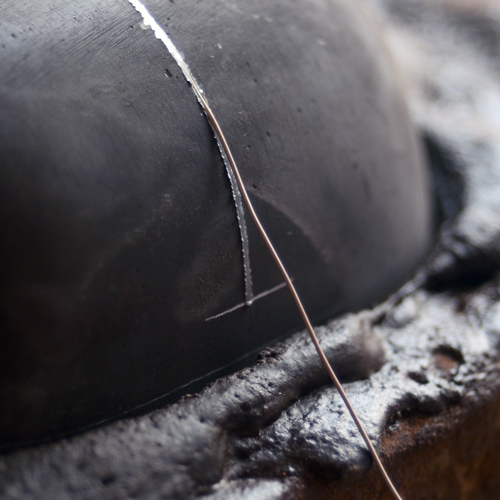
The detail of a silver wire that has been partially inlaid can be seen in the upper picture. In the lower picture, the craftsman is hammering the wire into the desired channel. Silver and copper being softer metals inlay easily. Brass is harder and needs to be hammered a lot harder.

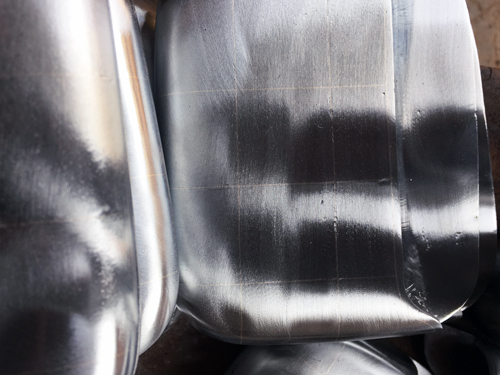
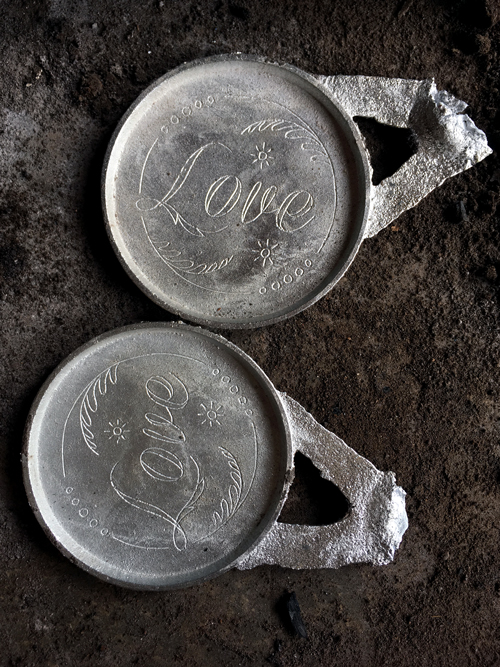
Inlaid wire looks like this. The piece is now ready to undergo the pre-finishing polish, involving hard buffing to smoothen out the surface, and soft buffing to give it a lustre. Once the piece has been polished, it is often hard to distinguish between the inlaid silver wire and the zinc, since they both shine equally well at that stage (see lower picture).

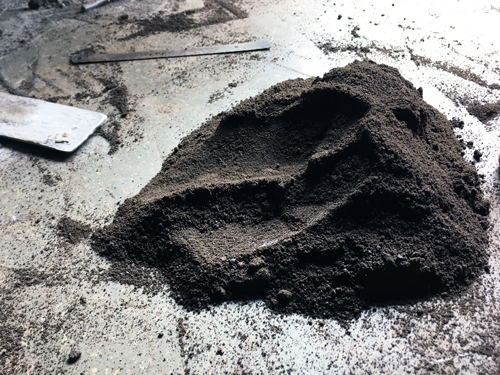
The next stage is by many ways the most crucial – the final oxidation of the object that shall impart upon it a black patina which forms the very identity of the Bidri craft. The soil credited with enabling this black oxidisation is collected from shaded areas of Bidar fort (above). The collector simply tastes it to ensure that it is the right kind. By many ways, this is the core skill passed on from each generation to the next. Taste.
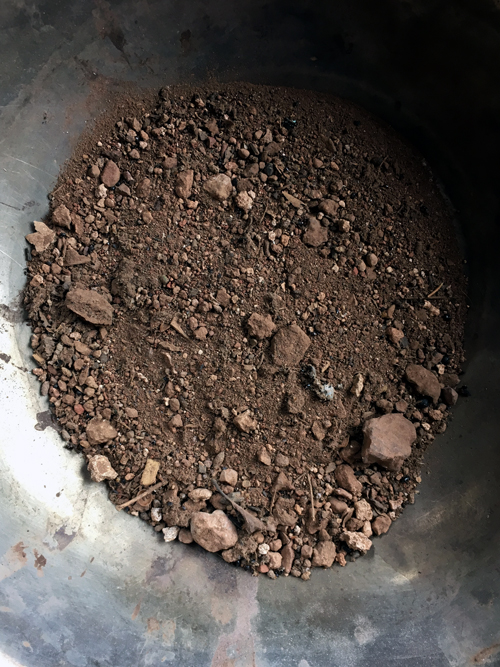
The mud collected from the fort looks like this (upper picture). After basic sieving to remove the larger pebbles, this is mixed with ammonium chloride (middle picture) to form a solution as seen above.

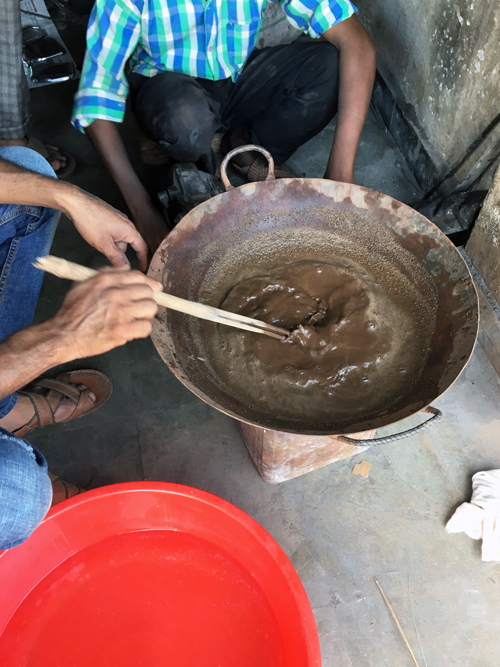
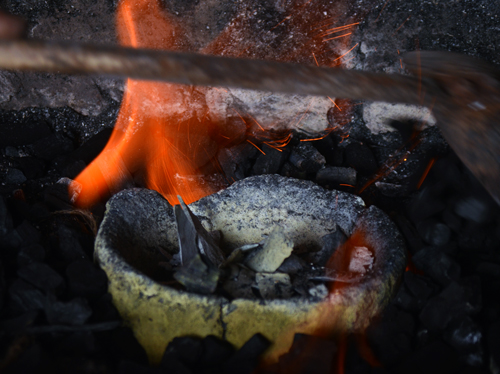
More water is added and the solution is then heated to a boil.
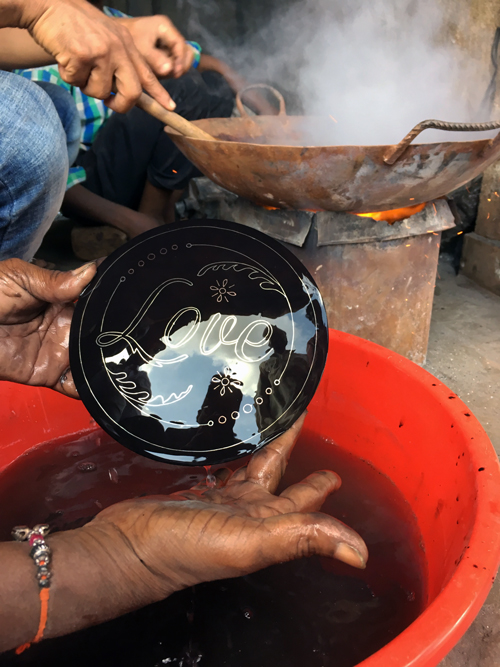
Sequentially, each polished piece is then dipped and throughly stirred in the heating solution. In about 15-20 seconds, each product is given a wash in water and all that was a shiny zinc surface turns a deep matte black. The inlaid metal, be it copper, silver or brass, does not attract the black oxidation. This is the precise moment that the Bidri process lays absolute claim to.
The geographical heritage tag associated to the craft of Bidri rests pretty much on the availability of the ‘magic’ soil from Bidar fort. With the Archaeological Survey of India getting increasingly strict about soil being collected from the fort premises, the craft shall of course look towards substitute oxidants. Already, new research at the IIT Madras has been able to recreate the Bidar fort soil in a laboratory. More such results shall of course define the future of Bidri ware.

These are finished Bidri coasters, the making of which can be seen in the some of the pictures above. They are inlaid with copper and silver. A set of two can be purchased at our studio webstore: www.towithfrom.com
More products shall be available soon through www.towithfrom.com and other offline and online channels.
Update: NOOK Vase, one of the products designed during the workshop, has received a nomination for the Elle Decor International Design Awards 2017 (EDIDA India) in the Tabletop Category.
Much thanks to the workshop team of 15 artisans at Bidar as well as Yathindra Lakanna, Sanjeev Kumar and Girinath Gopinath of Fashion and Lifestyle Accessory Design Department, NIFT. All Photographs ©Harpreet Padam 2017. Products featured at top of post: 1. PLOY Storage Box / 2. OID Boxes / 3. NOOK Vase
TOWITHFROM – significant little things

TOWITHFROM – our webstore long-in-waiting, has been online for a bit now. We call it a shop of significant little things – things similar to those we ourselves have found, discovered, loved and collected in zillions of boxes that share an ever reducing space with us.
The Japanese have a term for it – Zakka, which translates as ‘many-things’. Objects that exude a strong yet soft, cultural character and enhance personal lives and environments through their presence, and possession. A nostalgia of sorts. We could maybe describe it on a parallel with joys such as stamp, shell or coin collecting, the excitement of flea markets and thrift stores or even a profession such as archaeology.


An important line of products we are developing at TOWITHFROM are the ‘Made of India’ range. We design and develop these together with Indian craftspeople and they feature their own special TOWITHFROM label – a sign that the product carries a flavour of India that we would like to portray in signature TWF style.


As of now, shipping within India is free for products priced above INR 700 and INR 50 otherwise. As an introductory offer, we include a free two-colour 2014 calendar with all purchases. Click here to visit the TOWITHFROM store.
For regular updates, like the TOWITHFROM Facebook page or follow us on Twitter.

leave a comment